Managing Repositories
Repositories are connected and managed in Integrations Studio on the Repositories screen. This guide covers connecting a repository and the actions available for each connection.
Repositories screen
The Repositories screen lists every connected repository for your tenant. From here you can search, connect a new repository, and manage existing connections.
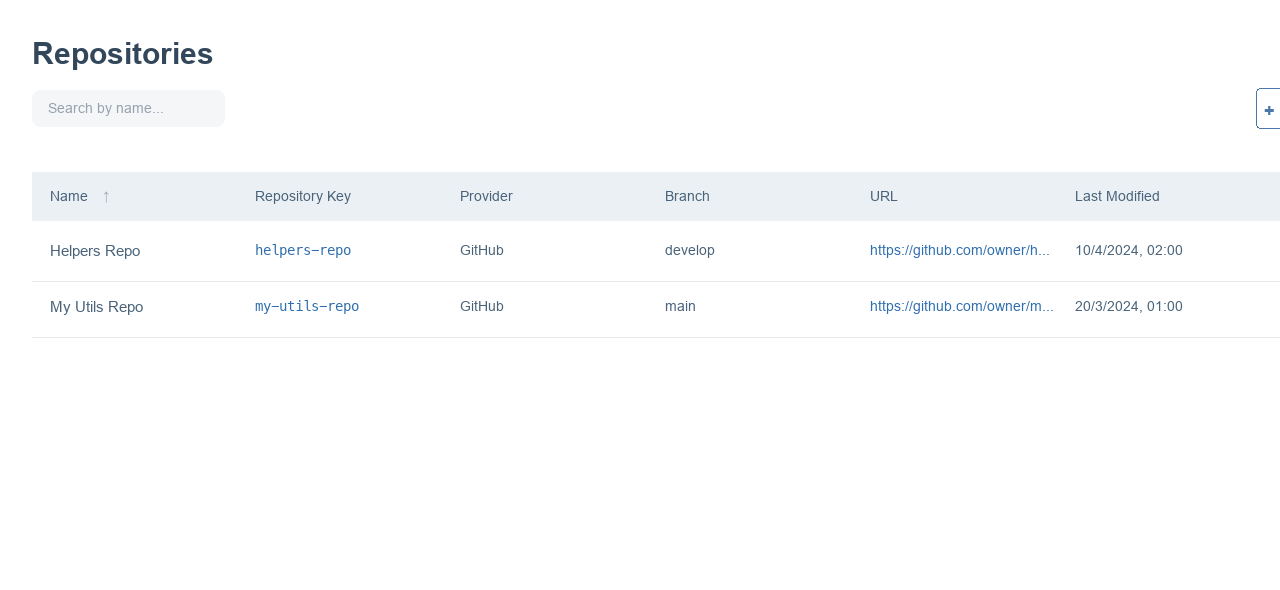
| Description | |
|---|---|
| Search | Filter by name or repository key. |
| Connect Repository | Open the dialog to connect a new repository. |
| Name / Repository Key | The friendly name and the unique key for the connection. |
| Provider / Branch / URL | The Git provider, branch and address of the repository. |
| Row actions | Disconnect, Refresh Token, Validate Token and Webhook Info. |
Before you connect your first repository, the screen shows an empty state.

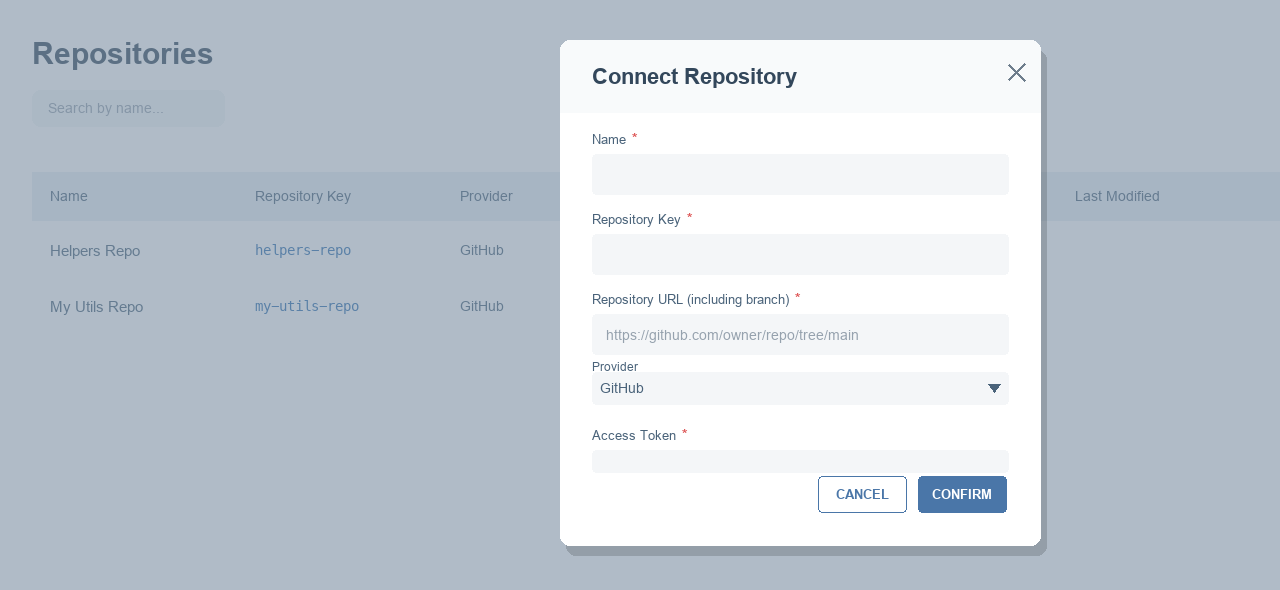
Connect a repository
Select Connect Repository and complete the dialog:
| Field | Description |
|---|---|
| Name | A friendly name for the connection. |
| Repository Key | A unique key, generated from the name and editable until you save. |
| Repository URL (including branch) | The repository address including the branch, e.g. https://github.com/owner/repo/tree/main. |
| Provider | The Git provider. Currently GitHub. |
| Access Token | A token that allows Fenergo to read the repository. It is stored securely. |
Row actions
Webhook Info
Opens the webhook details for the repository: a Webhook URL and a Webhook Secret (masked), each with a copy button. You use these values when setting up automatic synchronization in GitHub — see GitHub Setup and Automatic synchronization.
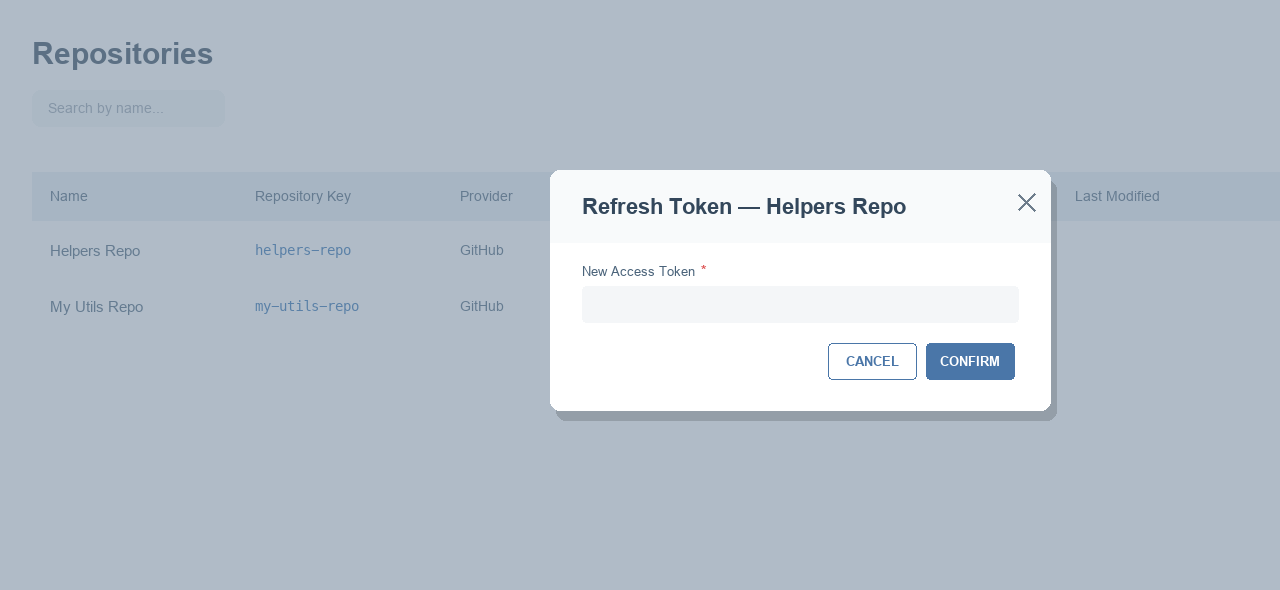
Refresh Token
If your access token expires or needs to change, use Refresh Token to provide a new one.
Validate Token
Use Validate Token to check that the stored access token is still valid.
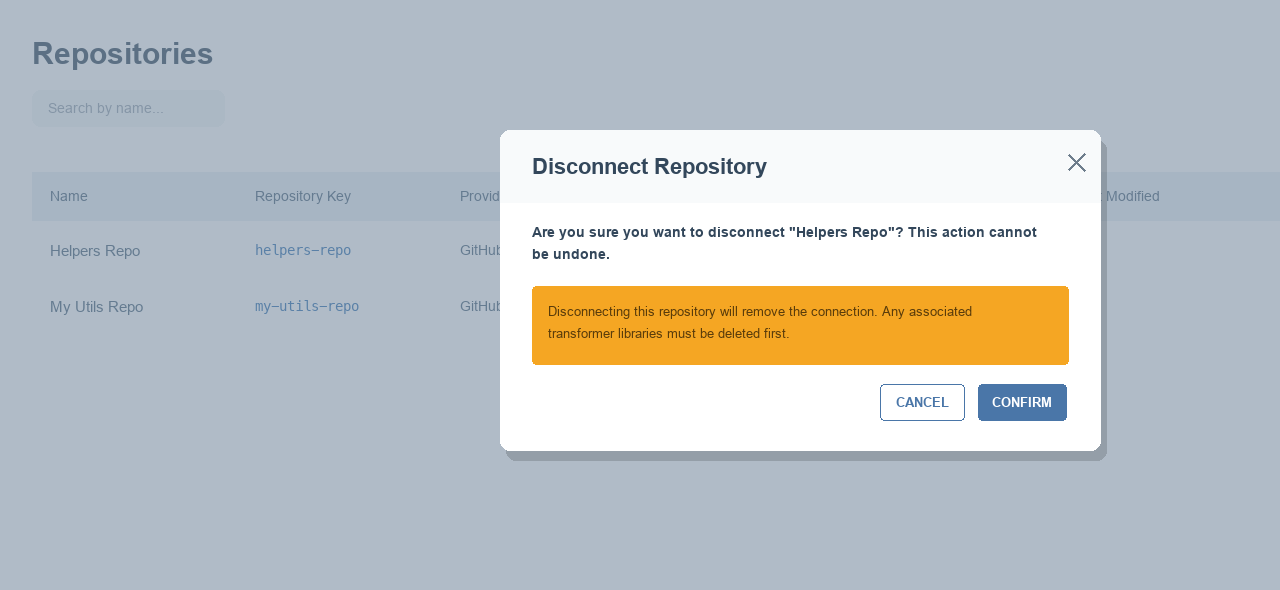
Disconnect
Use Disconnect to remove the connection. You are asked to confirm, as this cannot be undone. Any transformer library that uses this repository must be deleted first.